Sandstone - part 2

Intro
This post is a continuation of me writing about my first experiences on working with VR and Unity on a game called Sandstone. In this post I’ll briefly talk about on how I setup the project, which libraries I’ve chosen and what approaches I used when developing the game. Be sure to checkout part 1 if you’ve missed it.
Universal Render Pipeline
When starting this project I set out to experiment with Universal Render Pipeline (URP). This was a great decision as Shader Graph are is the bomb. Usually I avoid making shaders, however working with Shader Graph was really pleasant. The overall user experience could be a bit better. Some features are still missing and require scripting, though I think with time this will improve.
I can’t comment too much on URP as I’ve only scratched the surface. The key difference for me was the lack of some features. For example, the inability to use real-time shadows with point lights. I didn’t pay enough attention to documentation and skipped this point. Due to this I had to deal with leaking lights through walls and found no way around it.
VR library
I played around with few VR libraries to get a grip of what is available. I’m sure there are more out there, however I wanted to get this up and running quickly, thus here my takeaways.
VRTK
Initially I started out with VRTK. This library has quite a few pre-built assets which cover common interactions such as picking up objects, pushing buttons etc. Setting up simple interactions with this library was a quick task, however when trying to set up something more complex it became pain.
The whole toolkit is a huge mess of nested prefabs, debugging issues is a pain as you have to go down through multiple levels of nested components which all communicate via events. Documentation is also out of date and misleading as the current version (VRTK v4) is still in beta and missing most of the features from v3. The older version (VRTK v3) is unsupported and has various problems when setting up with current versions of Unity. Due to this, I’ve decided to move on and look for better alternatives.
Unity XR
Unity provides its own VR integration. I’ve only played around with example scenes and didn’t go too much in-depth. One thing I noticed was that the hand tracking lagged behind a bit in the sample scenes. Also, I was hoping that the library would include more prefabs for various hand interactions same as VRTK, however this part was lacking.
Moreover, in order to work with Unity XR I had to use Steam VR on top of Oculus App. This was annoying when testing out the sample scenes as each time I had to start both of the applications in order to test my project.
Recently there have been quite a few updates to Unity XR. I’m guessing it has improved quite a lot since last I’ve tried it. Possibly in the future it will improve even more and will be the go to set up for when working VR in Unity, but for this project I decided to skip it.
Oculus Integration
Since I had to install Oculus Integration for when setting up VRTK and Unity XR, I’ve decided to go with it. This asset comes with quite a few sample scenes of its own where hand interactions and locomotion are already built-in.
The biggest downside of this asset is that the sample scripts are utter garbage and are barely working. I made a mistake of relying on them early on and trying to build upon them until it was too late to switch. Next time if I pick up Oculus Integration, for sure I’ll be re-implementing every interaction instead of adding more meatballs on spaghetti.
Later on in the development process I wanted experiment a bit with custom hand interactions. After reading An improved way of grabbing objects in VR with Unity3D, I decided to implement a solution where objects are picked up using FixedJoint component. My prototype resolves the issue of being able to move objects through walls and doesn’t require parenting, however it is not complete. The scripts for this prototype can be seen here and usage can be seen in PrototypeScene.
One more thing that caused some issues with Oculus Integration was the usage of URP. In some cases shaders and particle effects would only render for one eye. I was able to work around this by using Single Pass rendering.
Testing scenes
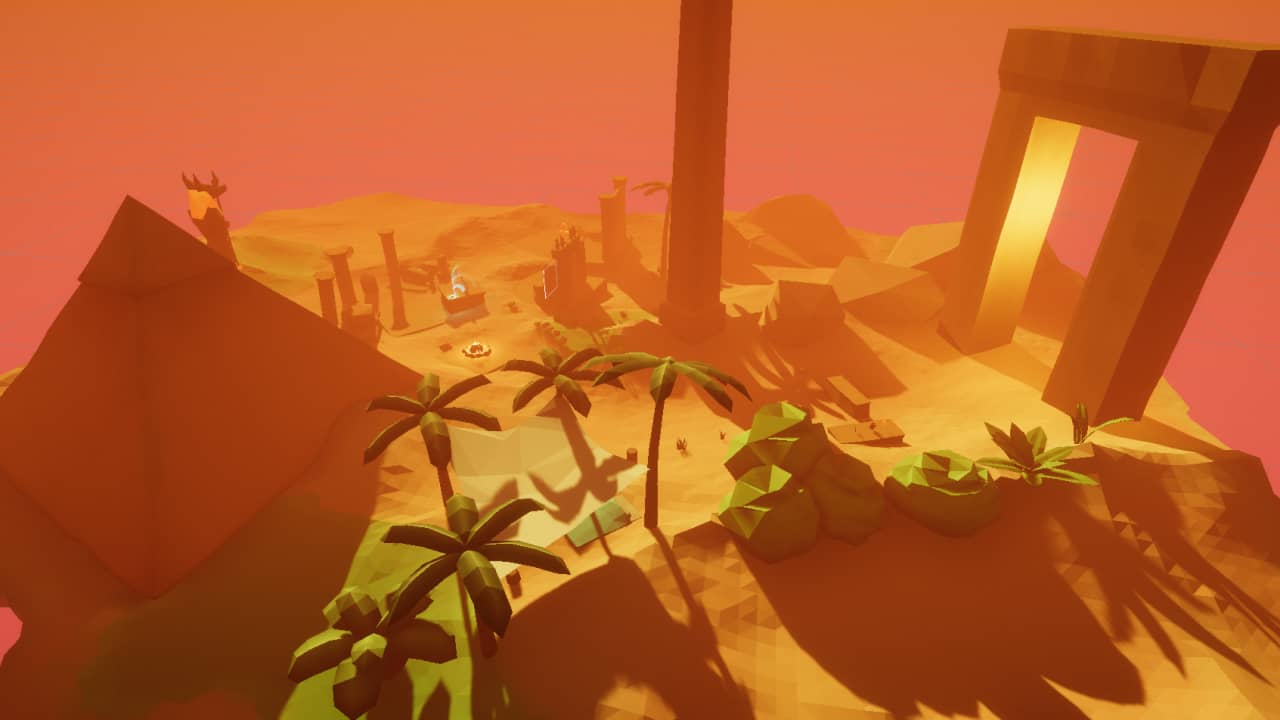
Initially I would test everything in the main scene which is a massive flying island. To reach certain areas and test features it used to take minutes. To solve this issue I moved all the intractable objects right next to the spawn point in order to speed up the process. However, as the project continued I quickly noticed that I would break things in the main scene and would not notice that.
Miniaturized island

Later on I created MiniIslandScene for rapidly testing all the games features. It is essentially the same main scene, except greatly scaled down and with fewer objects. During development process I would constantly break various features in this scene without noticing as previously in the main one, yet this time I would fall-back to the main scene and revert broken features if such an event occurred.
Git
One could say that Git should be used for this - make a new branch for a feature, screw up and revert. I found that branching created more issues than it solved. I still struggle with Unity and Git, as branching usually results in having to merge automatically generated .meta files which is not fun. Reverting is not as easy as well, since often it breaks the project and requires a reimport.
Working with Unity and Git requires more discipline than a regular project. If I were to improve my commits and their messages, this could be a bit more manageable.
Prototype scenes
When testing out smaller features, I started to set up even smaller scenes which would not require usage of a VR headset at all. For example the PrototypeScene where I tested custom hand interaction implementation. Using prototype scenes sped up the development process quite a lot as it is time-consuming and annoying having to put on the head-set each time after making a tiny change and hitting play.
Organizing
For any type of project I find that organizing code and assets (naming, style, folder naming and structure) is the most important part. For Unity, I find this to be even more true as a lot of work has to be done through the UI.
Prefabs
The best tools Unity provides for re-use and organization of assets are Prefabs and Prefab Variants. For example, for wooden intractable objects I defined a generic Wood_Grabbable. In this generic prefab I added components which enable grabbing, impact sounds, fire interactions and such. Then this would be used as a Prefab Variant to implement more concrete objects, for example a Log_01_Grabbable. The whole game is built using this technique.
Editor

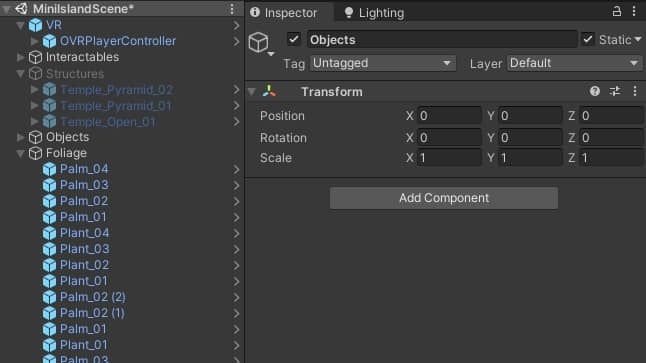
When working in the editor, I would create empty game objects centered at world origin which would then be used as folders for other appropriate objects. For example all grass objects would go under a game object named Grass and so on. This approach allowed me to quickly disable and enable groups of objects when testing, for example when testing hand interactions, I would disable everything apart from the ground and intractable objects.
Naming
When working with code I simply followed the naming suggestions made by Rider IDE. I think the more interesting part was naming assets. For this I adopted most of the suggestions made in
UnityStyleGuide. In the future though, I would like to create a more explicit set of rules for asset naming, as at the moment it is quite loose. Nevertheless, in the end following this style allowed me to quickly find the files I need. For example if I needed to find a texture which I couldn’t quite remember the name of, I would search for _Texture to filter out the noise and then look at the icons.
Closing notes
After looking at few VR libraries I was quite disappointed with their quality and available features. Yet even with these downsides, these libraries enable rapid prototyping which is the most important part. For the next project I will try out Unity XR and see how it goes.
In terms of development, I found that spending some time organizing the project is beneficial in the long run. This is even more important when working with Unity as it is too easy to break things without noticing. Having separate scenes for testing features also helps to reduce this risk.
In part 3, I dive into technical issues that gave me the most head-aches.